
How To Sew A Drawstring Backpack – Easy Tutorial With Pictures
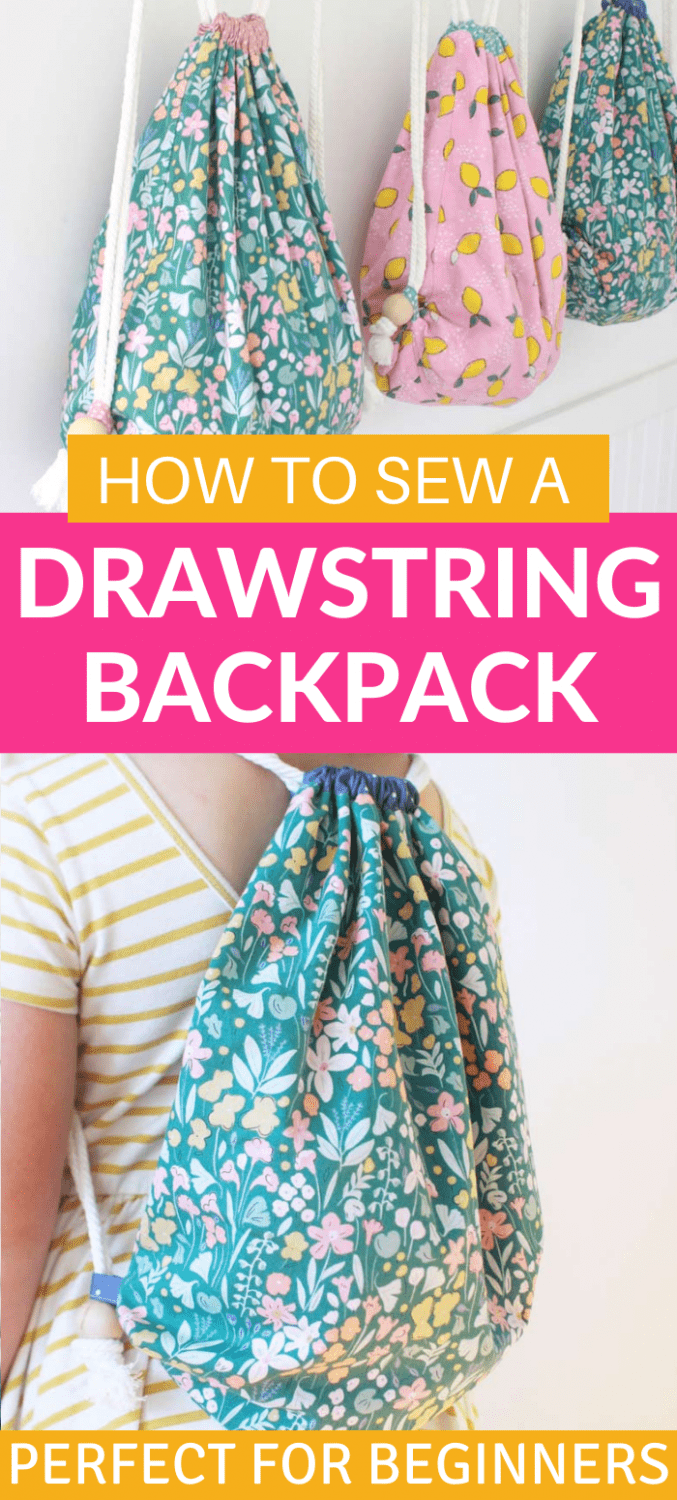
Learn how to sew a DIY drawstring backpack with this easy to follow step by step tutorial. A simple sewing project for beginners since you only need to know a few sewing basics. This lined bag can be made in less than 2 hours!

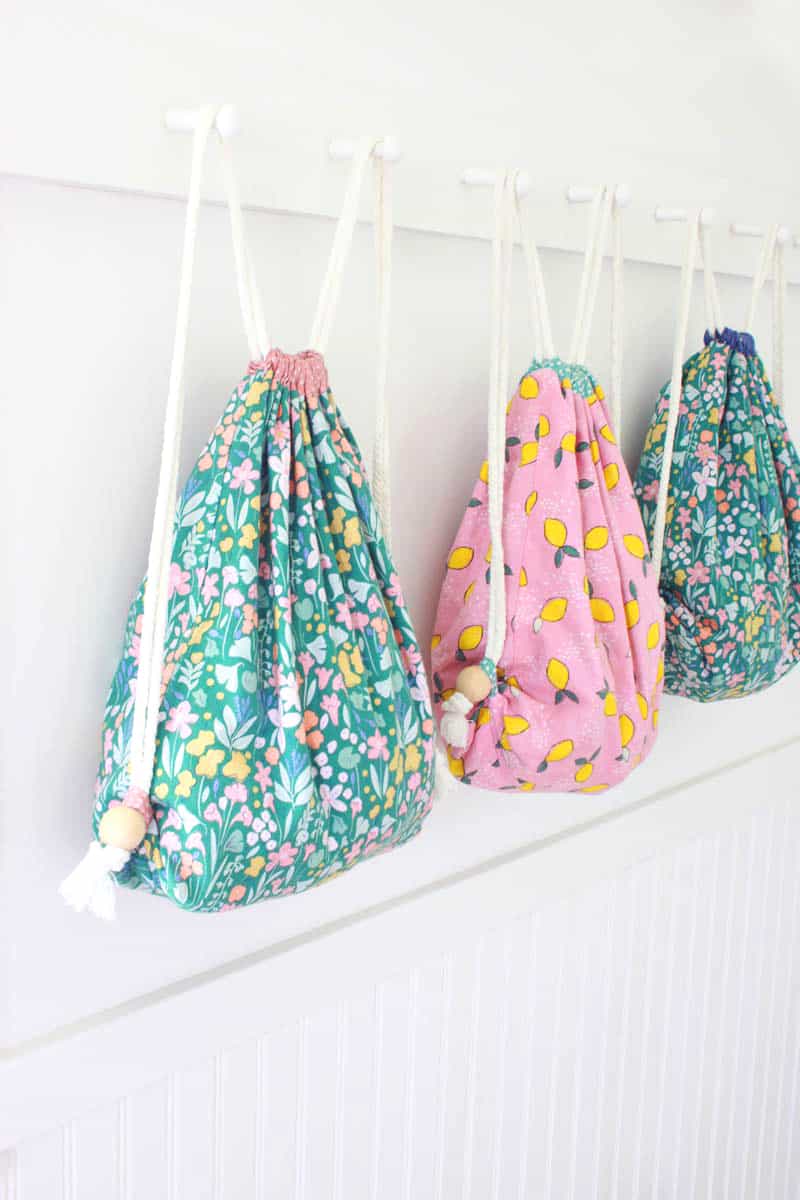
My three older girls (11, 9 and 7) have been asking for little backpacks to take on field trips and on outings with their friends. I love an opportunity to sew, so I decided to make them some myself!
I designed these bags so that the straps can be adjusted for littler kids or teens. Because I didn’t want any raw edges exposed, I made them fully lined.
This was a fun little project that only took a couple hours to whip up. My girls are thrilled with their new bags, and I know you’re going to love making one too!
This post contains affiliate links, which means I make a small commission at no extra cost to you. Get my full disclosure here.
Why you’ll like this project:
perfect for beginners
This DIY drawstring bag makes a great project for kids who are learning to sew, or for adult beginners because it’s a simple design and only requires basic supplies and beginner sewing skills.
quick to make
This is such an easy project, you can make a complete lined backpack in just 2 hours!
requires basic supplies
All you really need to make this bag is a sewing machine, pins, seam ripper and scissors. All things you probably already have.
low cost
I bought my fabric on sale at Hobby Lobby, so the whole bag cost me about $10 in supplies.
pictures for every step
To make things as clear as possible, there is a picture of every single step in this tutorial!
what you need to sew a Simple drawstring backpack:
materials
- 1/2 yard of main fabric – cotton fabric for the outside of that backpack.
- 1/2 yard of coordinating fabric – cotton fabric for the lining on the inside of the bag and tabs.
- 4 yards of thick cording, rope or string – to make the backpack straps.
- thread – that matches both of your fabric choices.
- 2 large beads – The beads are to keep the knots in the rope from pulling through the tabs. I used these Wooden Beads for mine.
supplies
- sewing machine – I’ve had my Brother sewing machine for 12 years now. It’s really basic and easy for beginners to use.
- seam ripper – you’ll need a simple seam ripper for this project.
- pins – you won’t get very far without a handful of straight pins
- fabric scissors – good quality sharpened fabric scissors.
- iron and ironing board – for pressing seams.
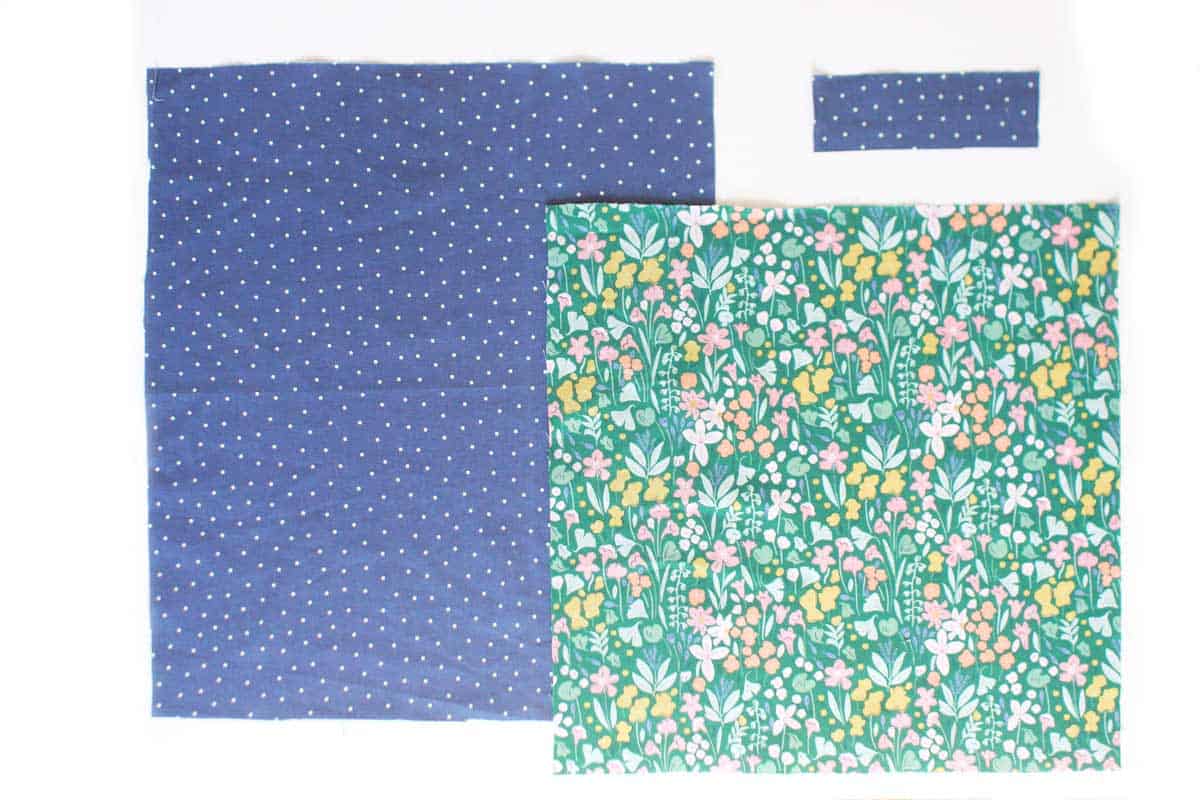
Cutting Directions for one Backpack:
Cut the following pieces of fabric:
- 2 rectangles 15″ x 15″ – out of the outside fabric
- 2 rectangles 15″ wide x 17.5″ – out of the lining fabric
- 1 rectangle 2″ x 6″ – out of the lining fabric
how to sew a Lined drawstring backpack:
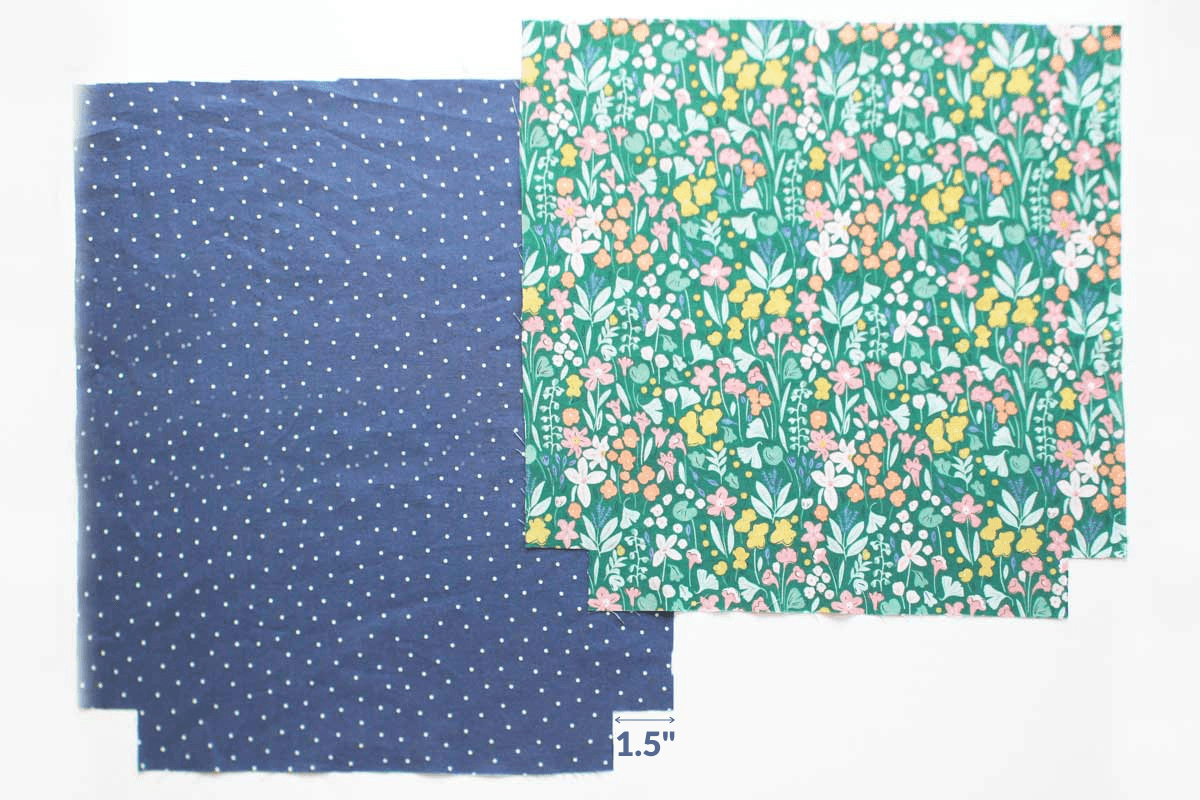
Step 1: Prepare the Corners of the Backpack
First, you will need to cut a 1.5″ x 1.5″ square out of each of the bottom corners of each of the 2 lining pieces and each of the 2 outside pieces of fabric. These will become the boxed out bottom corners of the bag.
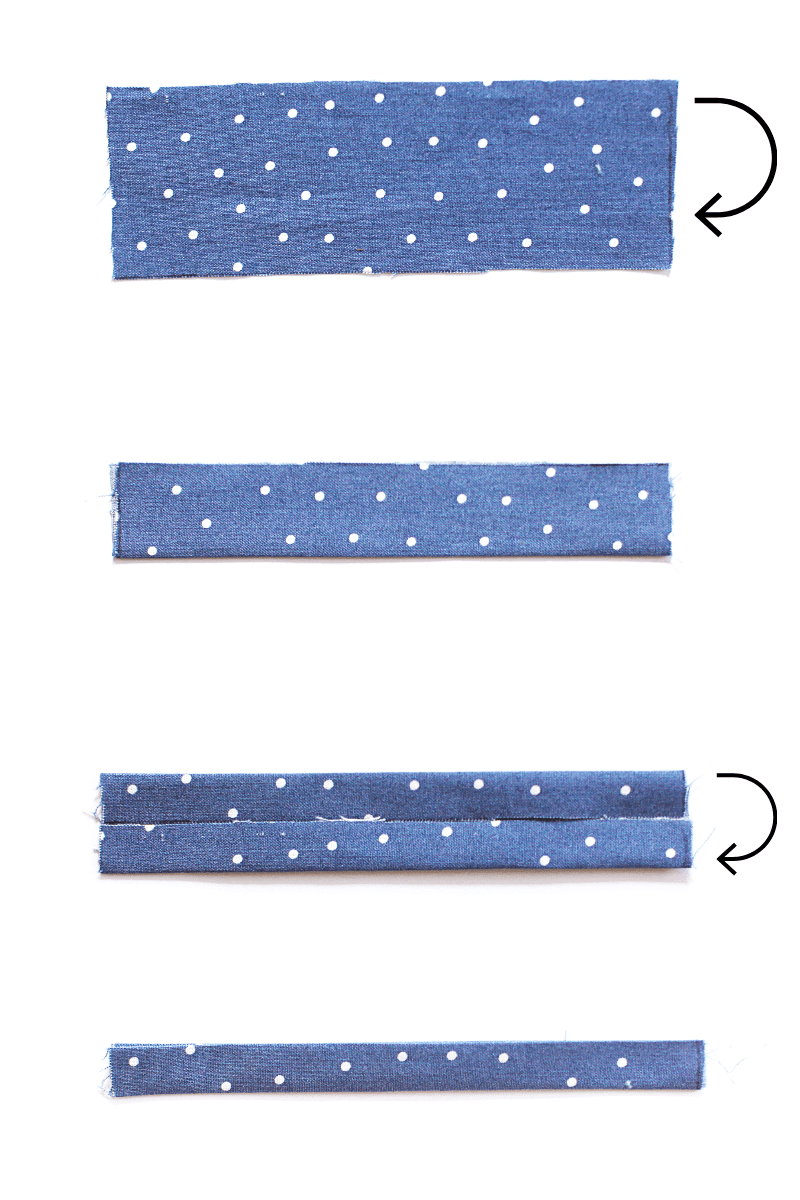
Step 2: Make Tabs to go at the bottom of the bag
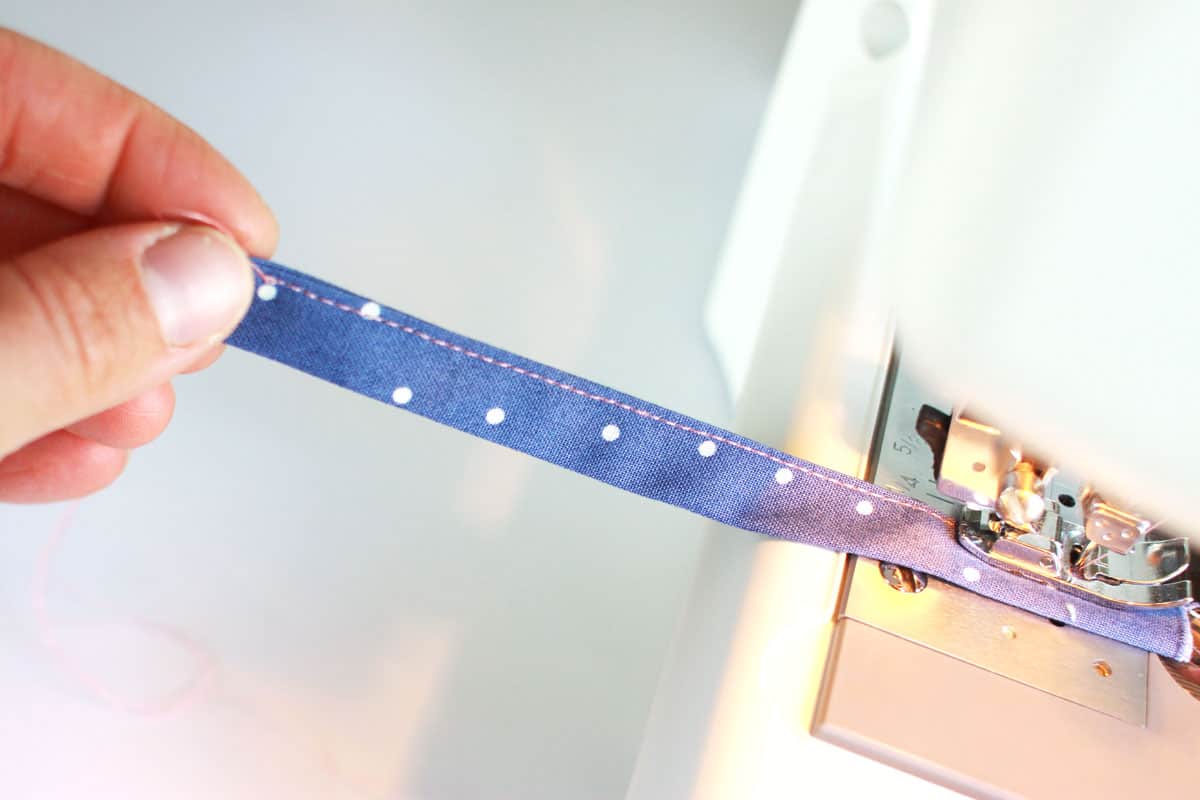
Take the 2″ x 6″ rectangle and iron it in half lengthwise. Open the rectangle up and fold each long side toward the crease you just made. Iron these. Then fold the rectangle in half again lengthwise and iron. You should end up with a 1/2″ x 6″ rectangle. Sew close to the long open edge of this piece. Cut this in half making 2 – 3″ tab pieces.
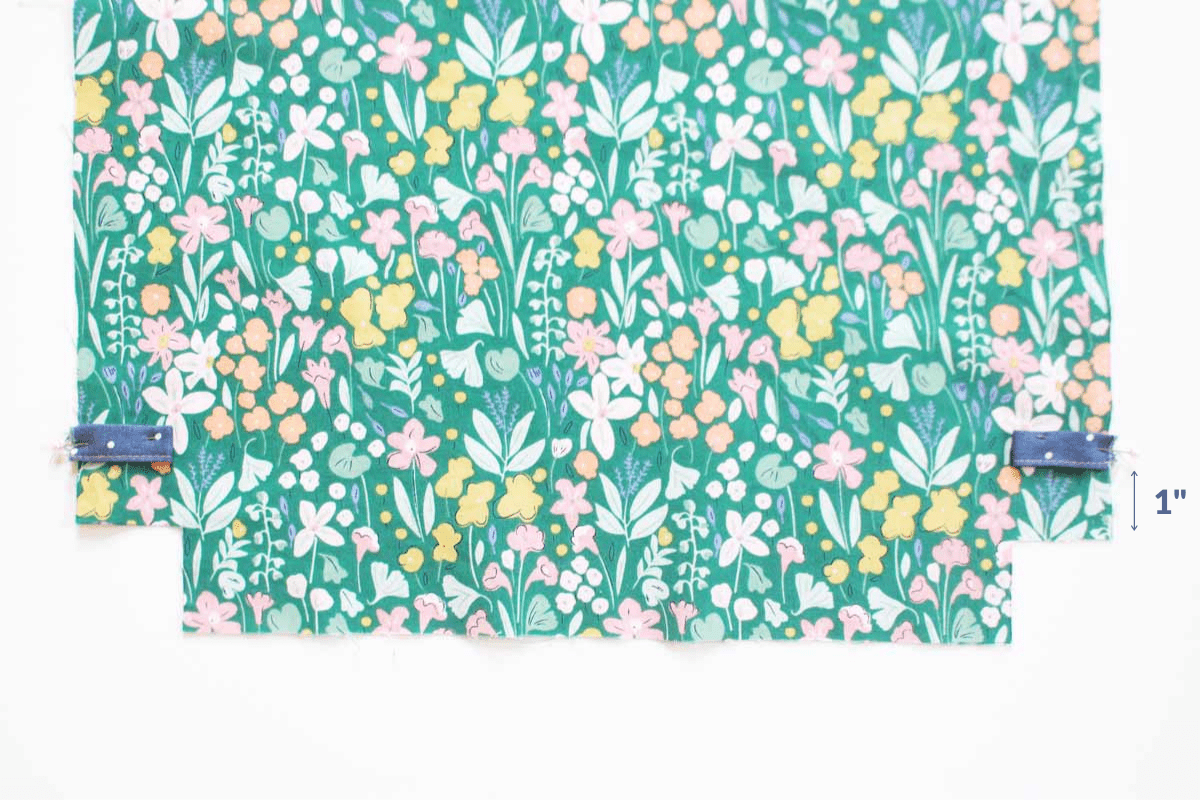
Fold each of these 3″ pieces in half and pin to the main outside fabric pieces, 1″ above each of the squares you cut out in step 1. Baste these in place.
Step 3: Stitch the Sides and Bottom
With right sides together and matching the cut out corners, sew both pieces of the outside fabric together using a 1/2″ seam allowance down the long sides. Do not sew the cut out corners.
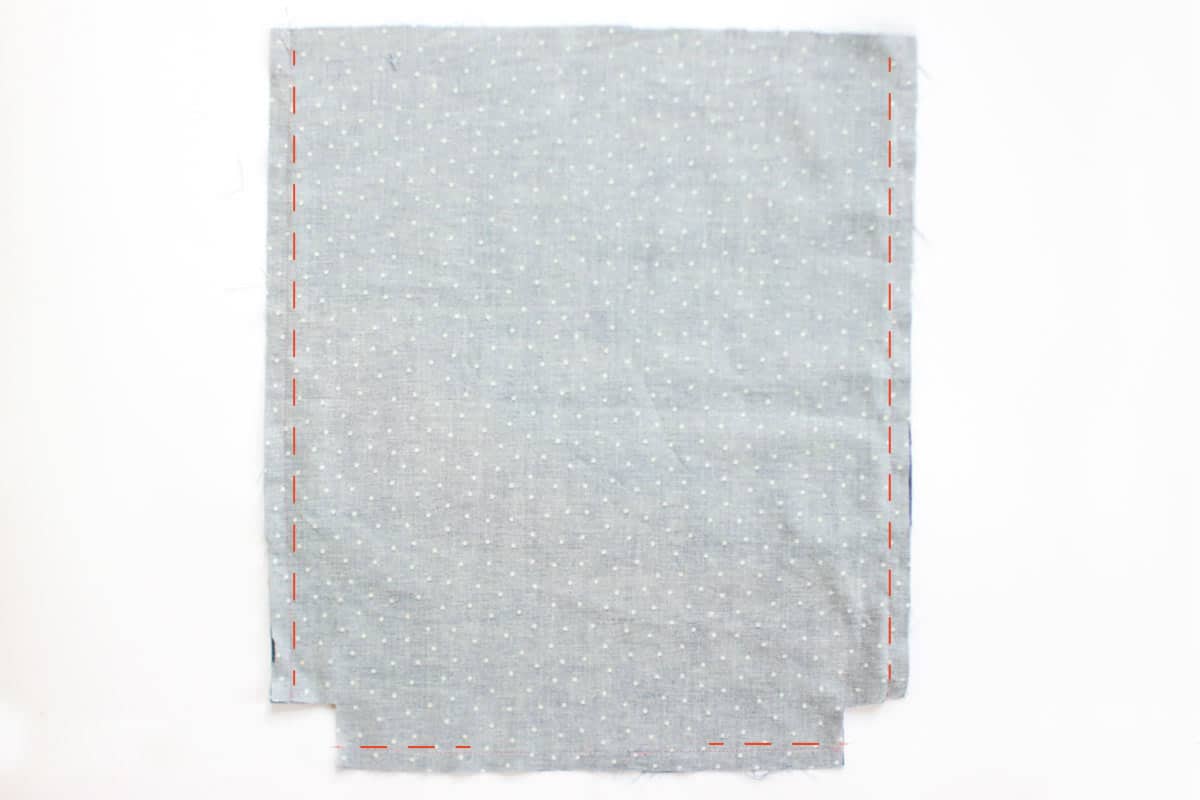
Repeat this step with the lining fabric, but leave a 3″ gap in the middle of the line of stitching along the bottom.
Press the seam allowances open.
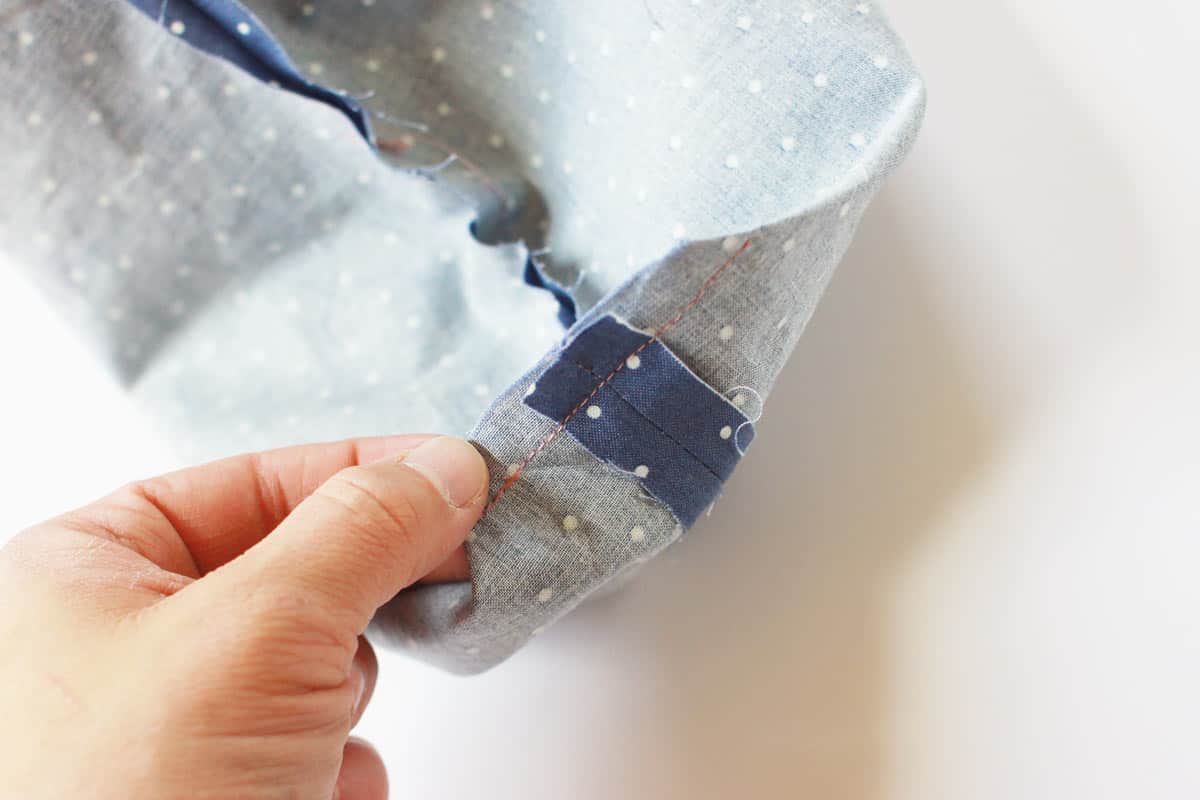
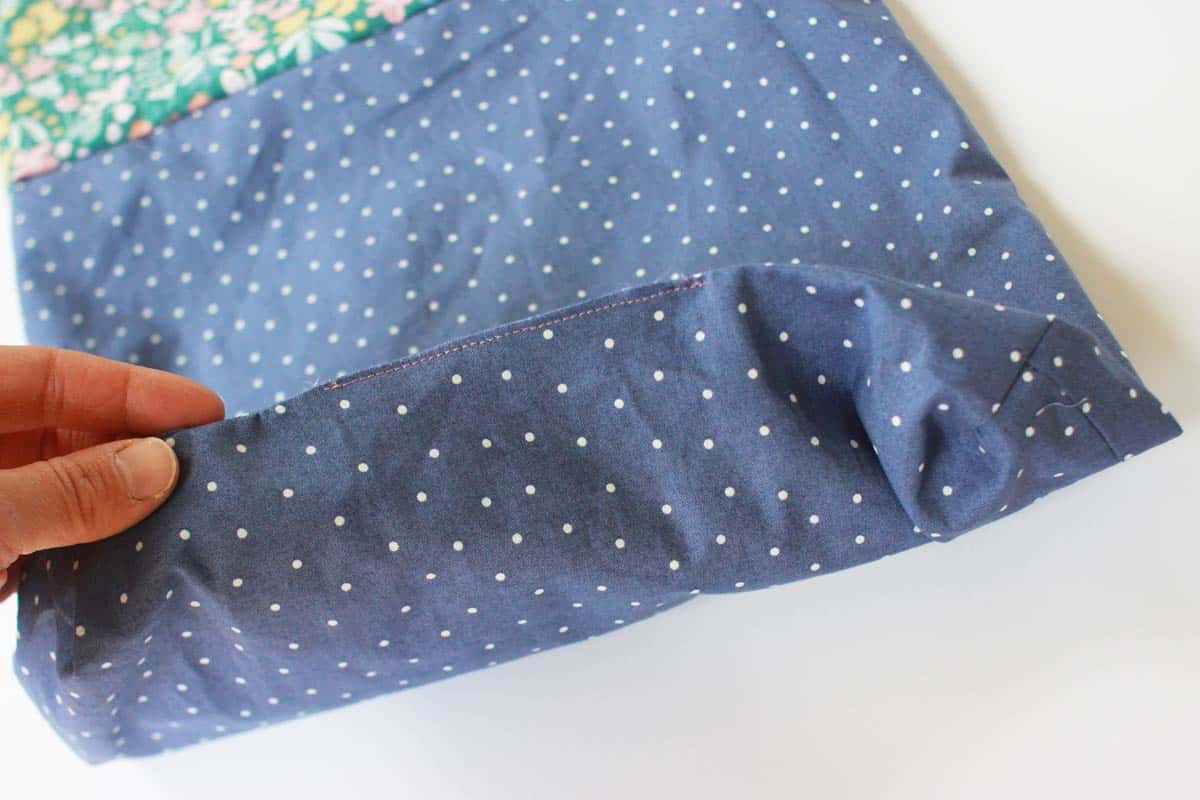
Step 4: Box Out the Corners
Now you will need to box out the corners on the lining and outside piece. To do this, pinch the top corner of the cut out squares on the front and back and pulling them apart, line up the side seams and bottom seams. The raw edges of the corner cut out should now be straight across, sew across the corner with a 1/2″ seam allowance.

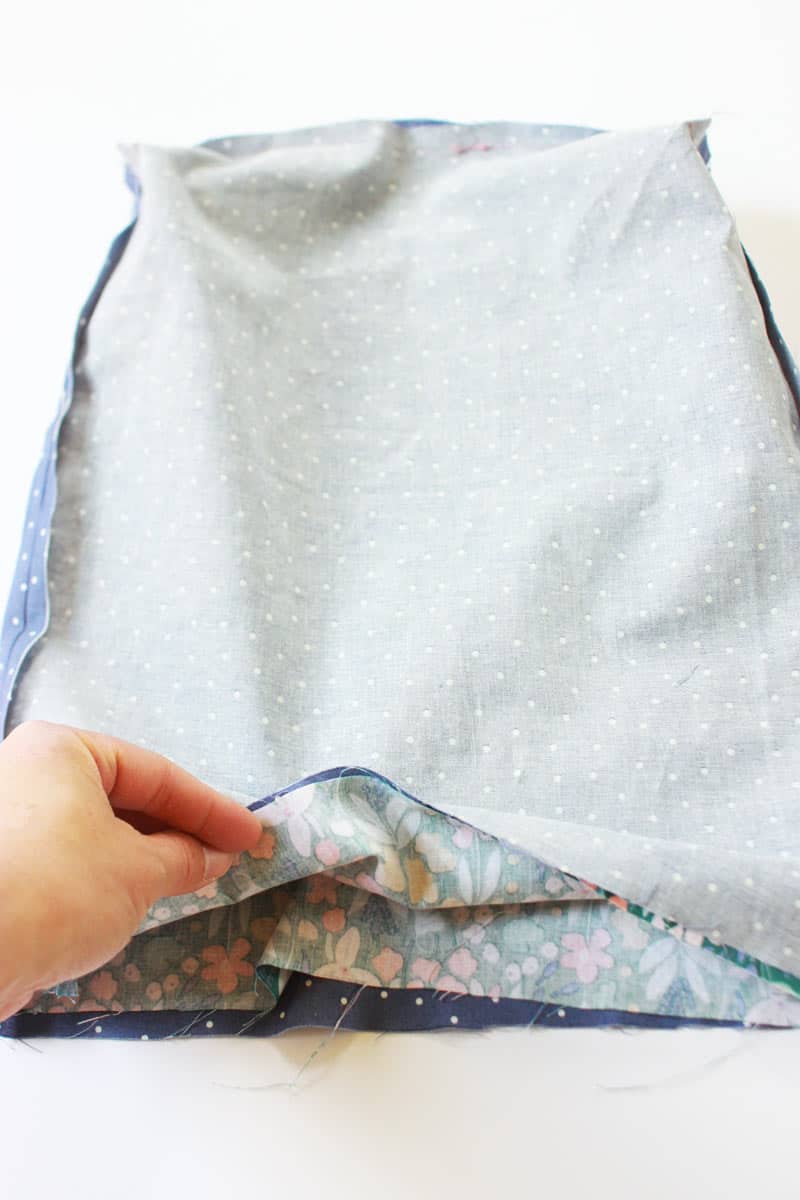
Step 5: Sew the Lining to the Outside of the Drawstring Backpack
With right sides together, put the outside of the backpack into the lining. Line up the top edge of each piece, making sure seam allowances match up. Stitch them together.
Using the gap you left in the stitching at the bottom edge of the lining, turn the whole bag right side out. Pinch the gap closed with wrong sides together and stitch it closed.
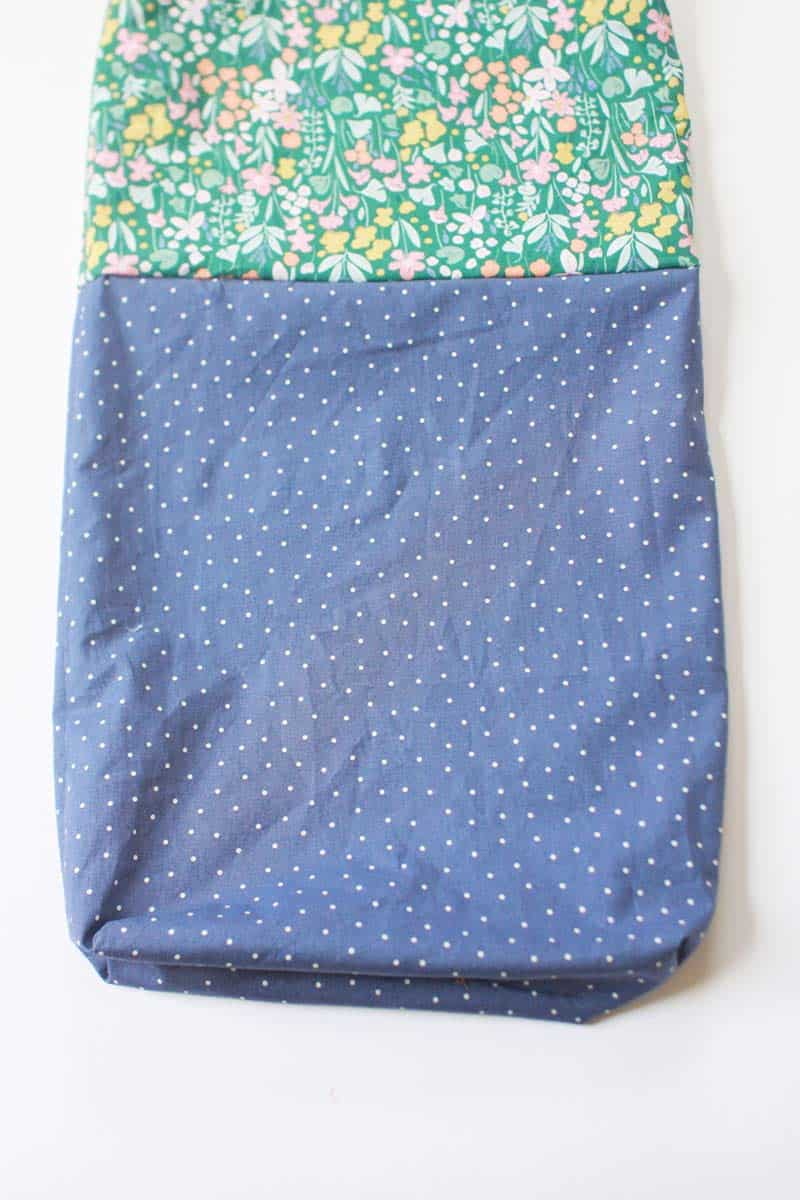
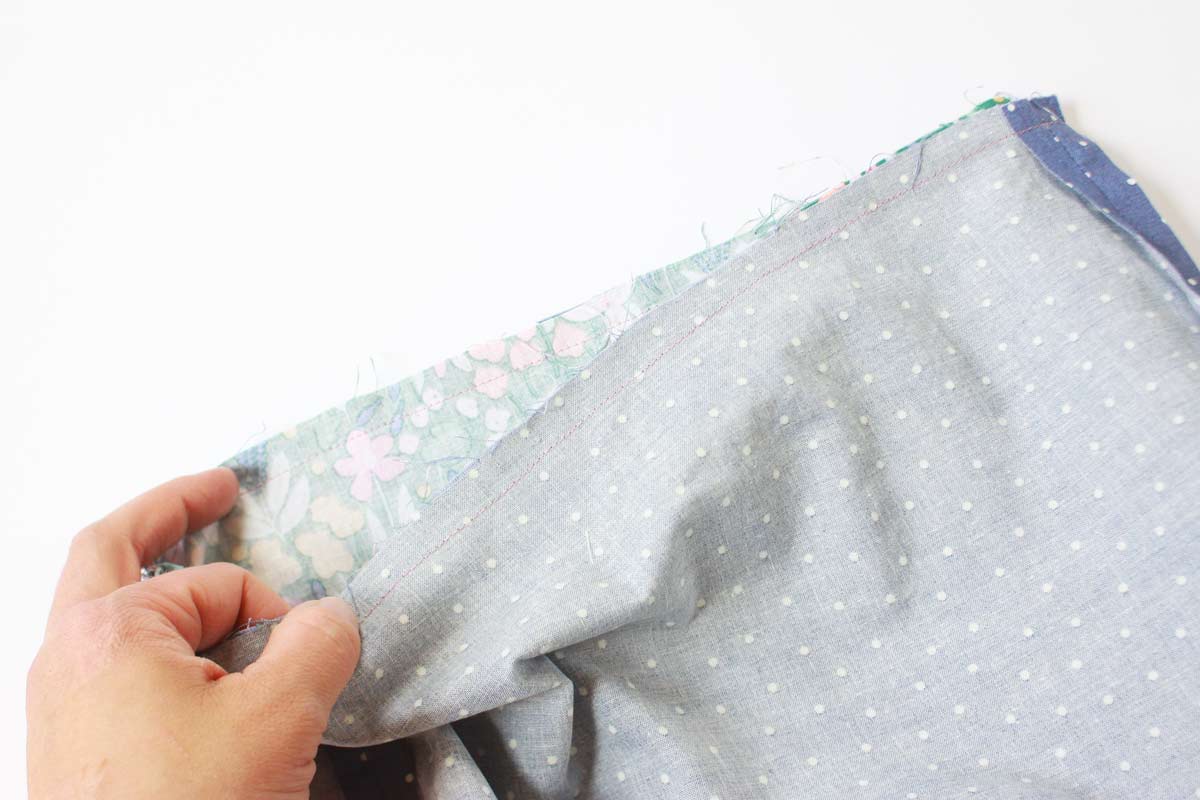
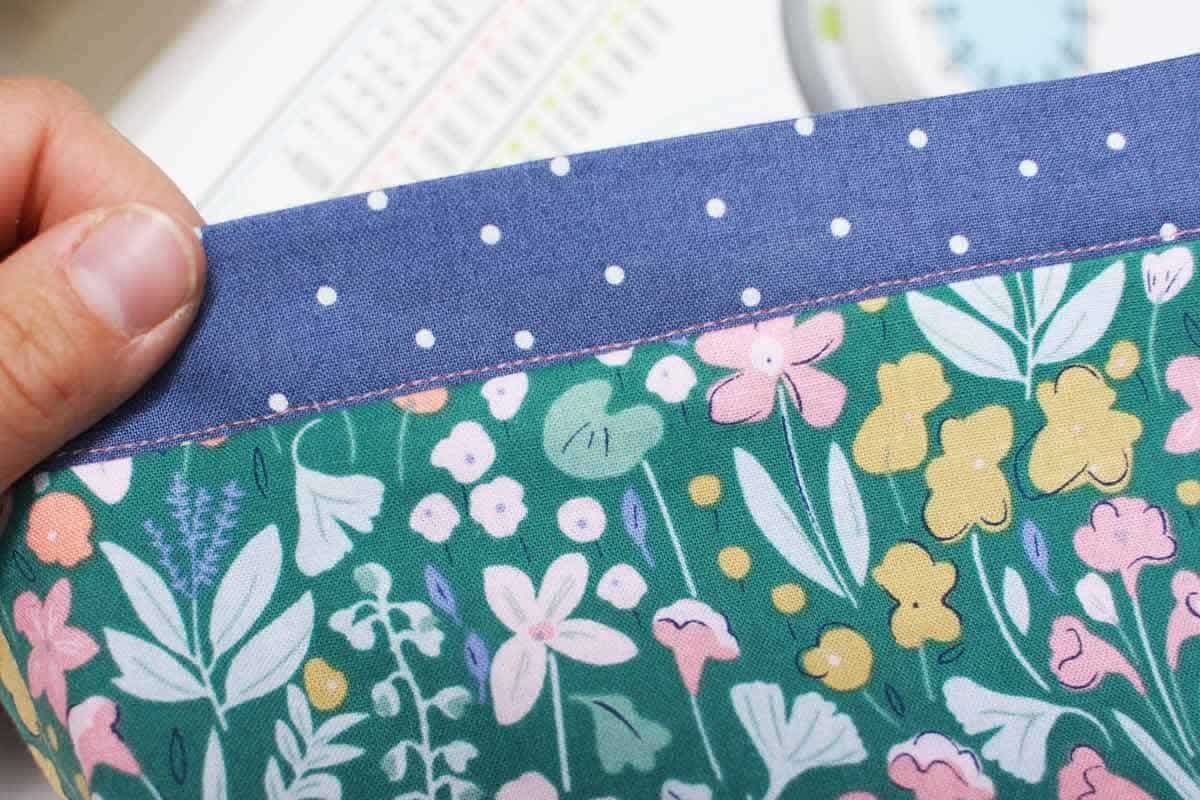
Step 6: Make the Track for the Straps to Go Through
To make a drawstring casing for the straps to go through at the top of the bag, fold 1″ of the lining fabric up so that its visible from the outside of the backpack. Iron this folded edge up and stitch close to the seam between the lining and the outside.

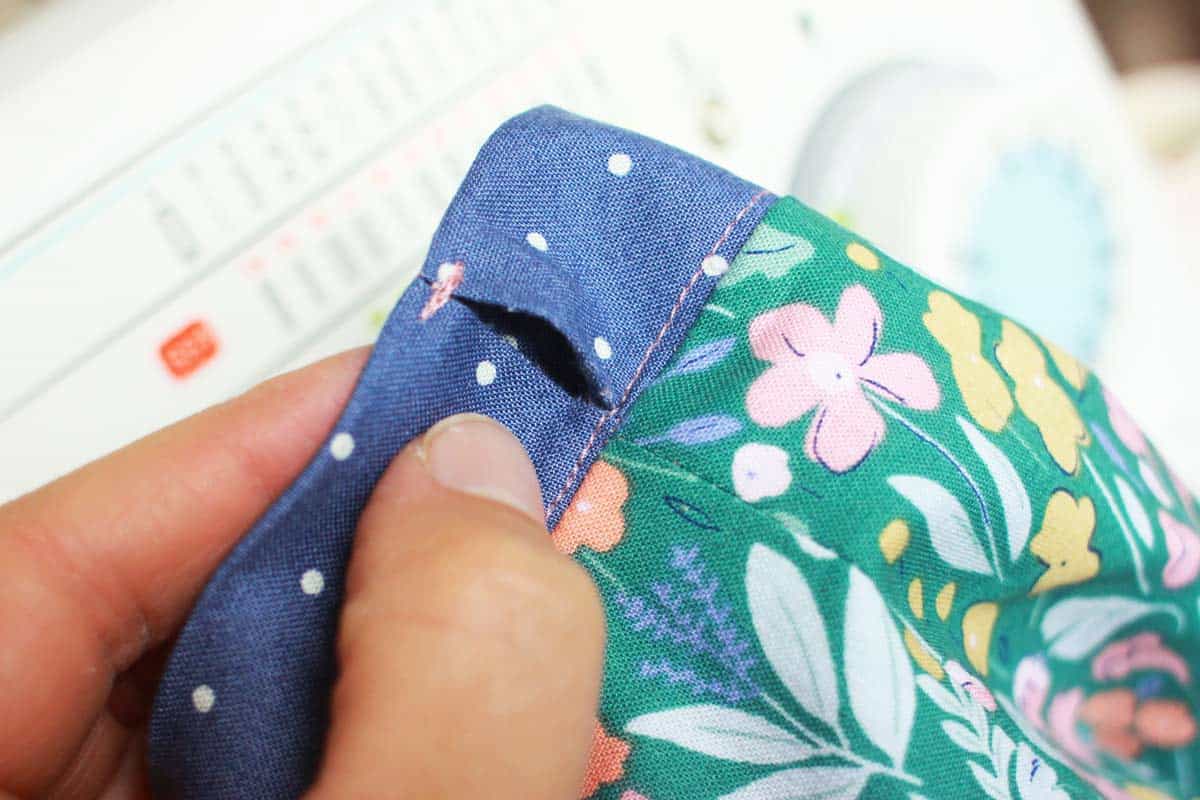
Using a seam ripper, pick out the stitching in the seam allowances on the sides in this track for the straps to go through. This is where you will feed the strings through. To keep the seams from unraveling further stitch and backstitch a few times along the top edge of the bag where you picked the stitching out.
Step 7: Add the drawstring cord/straps
Next, cut your strings or rope for the straps into 2 – 2 yard long pieces. Use a piece of clear tape to go around the ends of the rope to keep them from unraveling while you feed them through the track on the backpack.
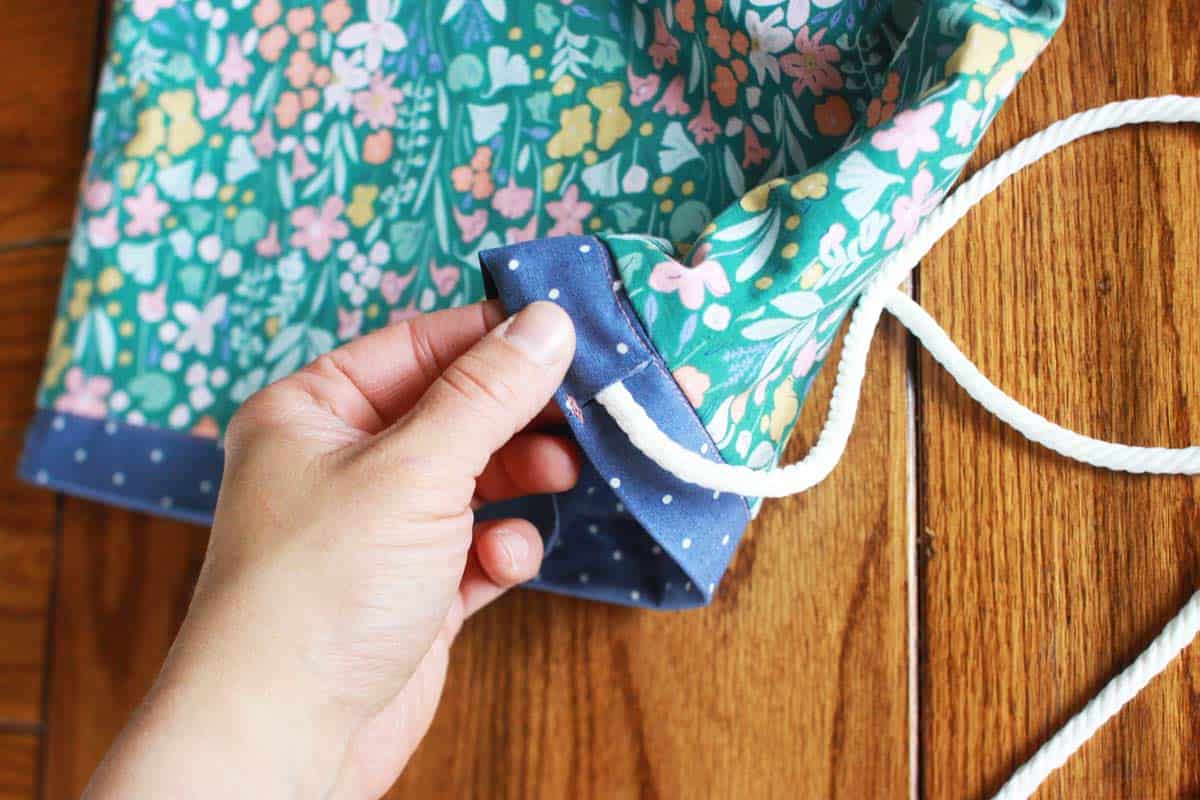
Take the first piece of cord and feed it through the track, coming back through the same hole you started it in. Do this same thing with the other cord so that you have two pieces of rope coming out of each side of the backpack.
Put both of the ends of each arm strap through each of the tabs at the bottom of the backpack and feed them through a wooden bead on each side.
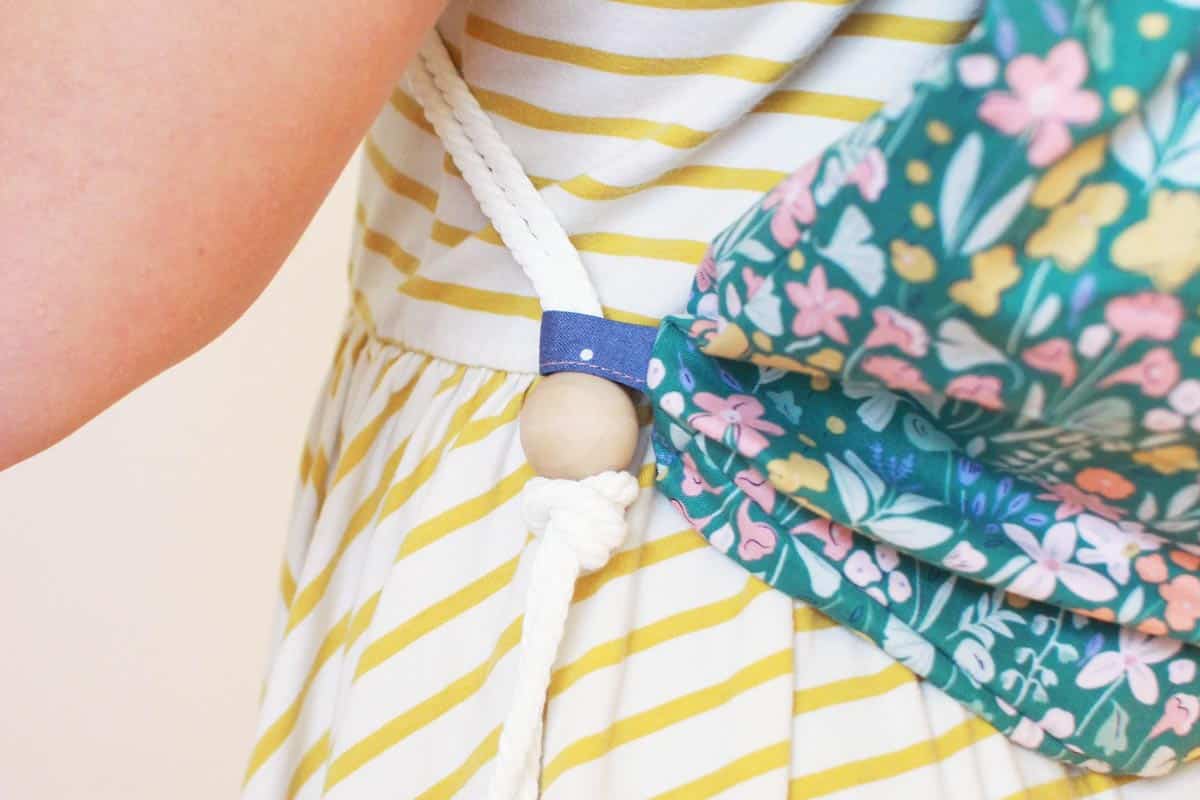
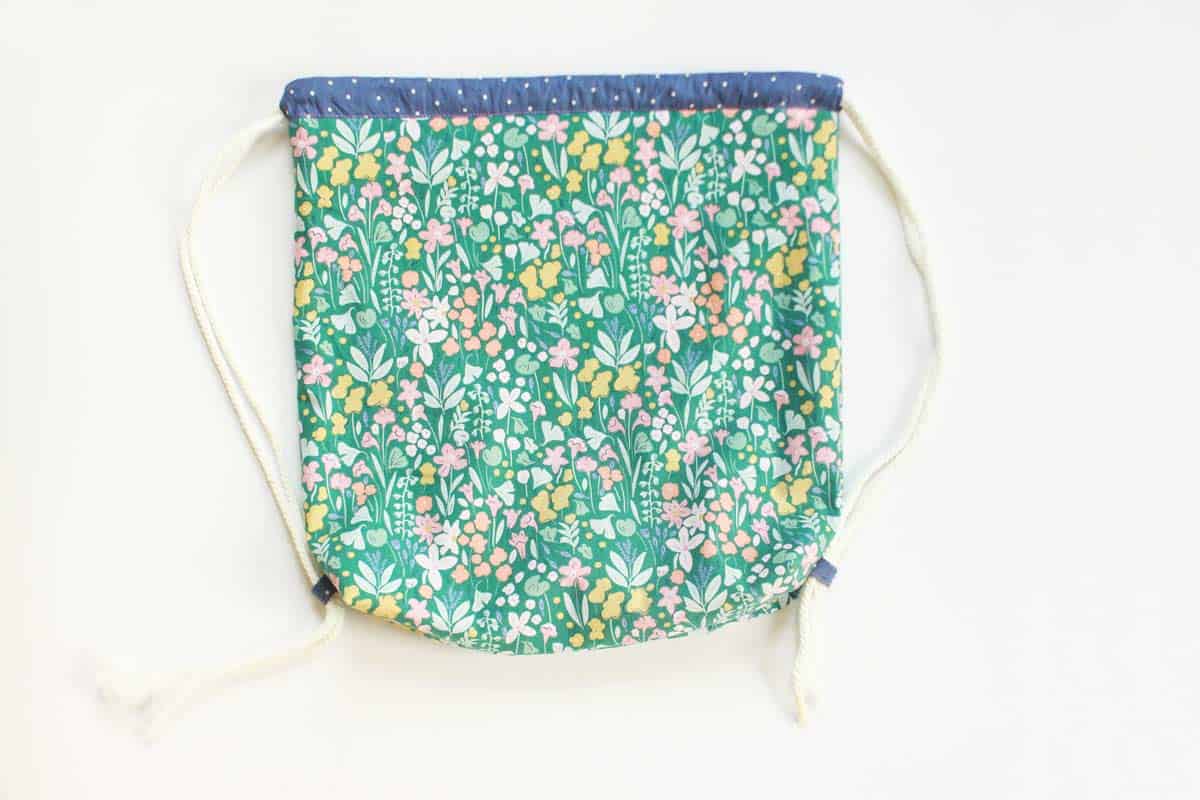
At this point its best to try the backpack on your child to see how long the straps should be before you knot them and cut them.
When you have both sides how you want them and they look even, tie a tight knot under each bead and cut the ropes off underneath.
More Sewing Projects for Beginners:
If you enjoyed this sewing tutorial, I really think you’ll like making these other projects too!
I hope you love making this lined drawstring backpack! If you make it, I’d love for you to come back and leave a comment and rating so that I know how you liked it!
Pin these steps to try later. Tag @athomeontheprairie on Instagram to share what you’ve made with us!


So stinkin cute!! I love this so much, I want to make one for each of our littles and I love the fabric you picked!
Thank you Jayden! You’re so sweet! I love Hobby Lobby fabrics
Can’t wait to try these.
Send me a picture if you do!
Adorable! My daughter is wanting to make this! Thank you so much. She is going to love it!
Great tutorial! You’re photos are so clear and clean! I can’t wait to make one of these for my daughter. She’s a total bag lady and I know she’ll be carrying it everywhere filled with her treasures. Thank you!
These are absolutely adorable! I know a few little ones would would love their own unique backpack! Thanks so much for the inspiration!
So easy and a simple backpack is such a nice thing to have around. Sooooo many uses. Thanks for sharing!
Yes! My kids use them for everything!
Overall, this was q really fun project to make! I do have one suggestion though. Where the tutorial says, “Next, cut your strings or rope for the straps into 2 – 2′ pieces,” you might want to specify that you mean yards there. I used some stash cording, so I had more than four yards and didn’t look at the materials list. So when I read that part, I read “2 – 2 feet pieces” (because this 5’2″ means five feet 2 inches, I understood feet there). Definitely user error on my part, but it might help the next person to clarify that it’s yards since I ended up with cords that were way too short lol. Overall, it came out SUPER cute though, thanks for posting this!
I’m so glad to hear that Lisa! And thank you so much for pointing out the mistake in the rope lengths! This was one of my first blog posts and I definitely needed to go back and fix it!
I made 2 of these this evening with plans to make 3 more. They will be used in place of wrapping paper for my nieces and nephews Christmas gifts. Excellent tutorial! I did have to change the rope length to 6’ instead of the 2’ you suggested. It wasn’t nearly long enough. The 6’ gave me a little wiggle room to clean up the ends. Thanks for the tutorial.
I’m so glad to hear that Jaime! And thank you so much for pointing out the mistake in the rope lengths! This was one of my first blog posts and I definitely needed to go back and fix it!
Thank you so much for this pattern! I just finished making one as a gym bag for myself and I couldn’t be more pleased with it. I love how the lining shows through on the top band and matches the tabs. Brilliant
I’m so glad to hear that Megan!!
I love the pattern but the price of cording for the ties is atrocious at Joanns. $3 a yard for cord makes the cording more expensive than the fabric. I went to the local farm store and found 100 yards of paracord for $16. Quite the difference in price.
It’s actually 100 ft for $16, Sorry about that, but still makes it 300 yards for the price of 5 at Joanns.
LOVE this pattern. Just wanted to clarify the sizes of the outside and lining of the bag. The first says rectangle (square?) 15 x 15 of outer fabric. So the outside of the bag is 2 inches shorter than the lining to facilitate the fold over of the lining to make the casing? Just want to make sure I am cutting the fabrics the right size. Thank you.
Thank you so much. My 4-year old granddaughter chose the fabric and the backpack turned out great. I looked at a lot of online tutorials before I chose yours. Your explanations and pictures are very clear, I wanted a lined backpack and I really like the flat bottom. So, this is wonderful!
I’m so glad to hear that Kathy!!
Great pattern and tutorial. I made one this afternoon for my daughter for Christmas and it took me about an hour and a half start to finish. It was easy to follow. The wooden beads are a really cute embellishment. I may need to make more soon.
I’m so glad to hear that Tina! Thank you for coming back to let us know how it went!
What was the thickness of the cord that you used?
About 1/4 inch thick
I just made this bag and it was super easy to follow. The only thing I didn’t have was the bead so I just tied it.
Thank you so much for posting this pattern. It was easy to follow and I like that you added pictures. Since I did not have any roping I used your directions for the tabs and made my straps from that. Really liked how they turned out!
I really like that idea, Betsy! Thank you for sharing!
Have you ever considered the environmental impact of making your own backpacks instead of buying them, and how can DIY projects like this help reduce waste in the fashion industry?
I’m going to make some of these for the Operation Christmas Child boxes this year. The lining will make them sturdier than a single layer of fabric. I’ll probably sneak one in for my granddaughter while I’m at it. Thank you for sharing this great pattern!
That sounds wonderful, Holly! Best of luck!